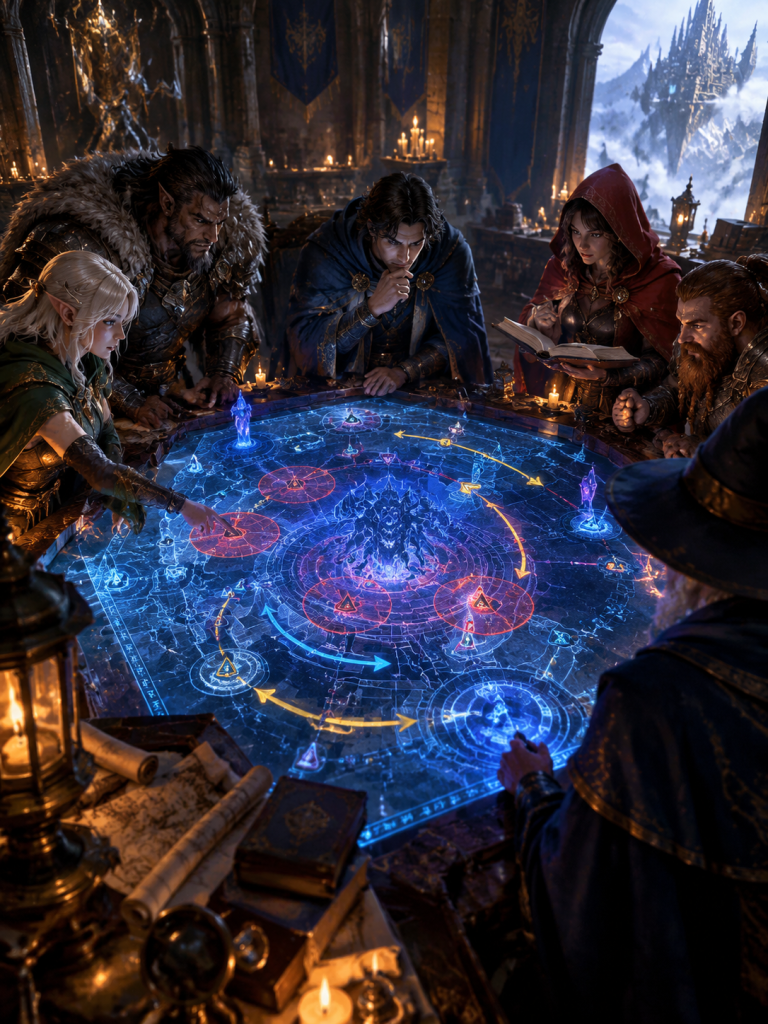
Boss mechanics in WotLK 3.3.5a are the actual skill of raiding, and they are learnable in a way that gear is not. Every boss has a finite list of things it does, and a player who can decode that list on the first two pulls is worth ten players who need ten pulls to learn it. The difference is a method: watch the fight, not the meters. On WoW Forever in 2026, where you may have fewer than ten people in your raid, that method matters more than any tier of gear.
This guide is for WoW Forever players in 2026 who want to learn bosses faster. By the end, you’ll know how to read an encounter, what to look for in the first pull, and the mechanics categories that explain almost every fight.
Quick answer up front: Every WotLK boss mechanic falls into one of seven categories — targeted damage, AoE damage, positioning, movement, adds, interrupts, and dispels. Learn to spot the category in the first pull and you can solve most fights before you have killed the boss three times. See the WoW Forever ICC Raid Guide (2026) for the raid-specific application.
—
Why learning fights is the real endgame skill
Three things make encounter knowledge more valuable than gear in WotLK:
- Gear is server-dependent; mechanics are not. Your admin can double your drop rate, but they cannot teach you that the Lich King’s phase 1 is a copy of the Blood Prince Council.
- Mechanics transfer between fights. Learn “the boss casts a big frontal cone, face it away from the group” once and it applies to 40 bosses.
- A wiped raid is the most expensive thing in the game. Not in gold — in morale. A guild that wipes 30 times on one boss breaks up, and a guild that learns it in 8 pulls keeps its roster.
The practical implication: spend your first two pulls watching, not playing. It feels slower and it is faster.
—
The seven categories of boss mechanic
Every mechanic in the game is one of these. Learning to name the category is 80% of learning the fight.
1. Targeted damage (the “big hit”)
What it looks like: The boss casts a spell at one specific player, usually with a cast bar.
The solutions:
- Interrupt it (see below).
- Move out of the cone if it has a visual (a red arrow, a marker under your feet).
- Reduce it with a shield (Power Word: Shield, Ice Barrier, Divine Shield).
- Spread it so the boss picks a different target.
The examples: Sindragosa’s Blood Bolts (channel, must interrupt), The Lich King’s Harvest Soul (channel, must interrupt), Cleave on a melee.
The learning cue: the cast bar appearing with a yellow or red colour usually means “interrupt this.”
2. AoE damage (the “room damage”)
What it looks like: Damage that hits everyone, or everyone in a defined area.
The solutions:
- Move out of the area.
- Spread out so not everyone is in it.
- Stack (counter-intuitively) when the damage is reduced by being close together, or when it is a “stack the raid” mechanic.
- Use the raid cooldown (Power Word: Barrier, Tree of Life).
The examples: Frost Tomb in The Oculus, Unmake in The Violet Hold, Locust Swarm in Obsidian Sanctum, Frost Aura in the Lich King fight.
The learning cue: a large ground effect with a colour. Blue or purple usually means “get out.”
3. Positioning (the “stand there”)
What it looks like: A cone, a line, or a directional cleave.
The solutions:
- Tank positioning: face the boss away from the raid. This is the single highest-impact positioning rule in the game.
- Angle yourself: stand to the side or behind, depending on the mechanic.
- Spread: for cone mechanics, being 5 yards apart is not enough — the cone still catches you.
The examples: Flame Breath (Onyxia), Tailsweep (Onyxia), Nether Blast (General Sessions), Frost Tomb.
The learning cue: an arrow on the ground, or a visible cone in front of the boss.
4. Movement (the “keep moving”)
What it looks like: A mechanic where standing still kills you.
The solutions:
- Continuously move in a pattern.
- Move to specific markers on the floor.
- Alternate between two positions.
The examples: Splinter in Risen Incarnate (stand in specific circles), Harvest Soul positioning in phase 1 of the Lich King, Locust Swarm (kill the adds).
The learning cue: circles, crosses, or runes appearing on the floor.
5. Adds (the “kill the smaller things”)
What it looks like: The boss summons creatures, and often the boss is invulnerable or heals while they live.
The solutions:
- Assign add targets explicitly.
- Tank them separately if the boss heals from them.
- Kill them fast if they heal the boss.
- Spread the adds if they do AoE damage on contact.
The examples: The Lich King’s phase 1 adds, Wintergrasp adds, Shackle the Undead.
The learning cue: the boss’s health bar stops moving or heals when you are hitting the wrong thing.
6. Interrupts (the “stop that cast”)
What it looks like: A cast bar on the boss that must be cancelled.
The solutions: Interrupt abilities, each with a short cooldown and a shared immunity system (some bosses become immune to interrupts for a few seconds after an interrupt, so you have to rotate).
Who can interrupt in WotLK 3.3.5a:
| Class | Ability | Notes |
|—|—|—|
| Warrior | Shockwave | AoE stun, 20 rage |
| Paladin | Hammer of Justice | stun, but also a silence on the next spell |
| Shaman | Hex | on a caster add, makes it interruptible but fear-immune |
| Rogue | Kidney Shot | 6-second silence, best single-target interrupt in the game |
| Mage | Counterspell | on a caster add |
| Priest | Psychic Scream | AoE fear, unreliable on many bosses |
| Warlock | Spell Lock (Felhunter) | AoE silence |
| Hunter | Intimidation | AoE stun |
| Druid | Bash/Claw | unreliable (they get immunity) |
The rotation rule: interrupts have a shared diminishing-returns system. After one interrupt, the boss is immune to further interrupts for a few seconds. So you rotate interrupts rather than having everyone dump them at once. This is the single most common way a raid’s interrupt chain breaks.
The learning cue: yellow or red cast bars.
7. Dispels (the “cleanse that”)
What it looks like: A debuff on a player that needs to be removed.
The solutions: Dispel abilities by class:
- Paladin: Divine Shield and Purify (single dispel).
- Priest: Dispel Magic (single), and Mass Dispel (AoE, with a GCD).
- Shaman: Cleansing Totem (single, or AoE with the “Mass Cleansing Totem” talent).
- Druid: Cleansing Totem as well.
- Mage: Remove Lesser Curse (curse only).
- Warlock: Purge (single).
The buffs you cannot dispel: Hysteria (Shaman), Battle Shout, Blood Fury, Rampage, and most boss debuffs that are permanent.
The learning cue: an icon on your debuff bar with the standard “not dispellable” grey overlay — and the debuff being dispellable is usually shown by the icon being coloured.
—
How to read a new boss: the first-pull protocol
This is the method that turns 10 pulls into 4.
Pull 1: watch, do not participate
Your only job on pull one is to observe. Do not pass mechanics. Do not optimise your damage. Watch.
What to watch for:
- The cast bar. Every cast on the boss is a mechanic until proven otherwise. Note the name and colour.
- The ground. Coloured circles, cones, arrows, and runes.
- The boss’s facing. Which way is he pointed? Which way does he turn?
- The adds. When do they spawn, how many, and what do they do?
- The debuffs on you. What is the mechanic, and is it dispellable?
- The health of the party. Whose health drops first? That is the mechanic hitting hardest.
- The timer. Does the boss enrage at 3 minutes? 5 minutes?
After the pull: write down what you saw. Not a theory — a list of the boss’s actions. “Casts fire every 30s. Cone in front. Adds at 50%.”
Pull 2: test one thing
Do not change everything at once. Pick the single mechanic that killed the most people and test it.
The testing method:
- Move out and see what happens. Did you take damage? Was it avoidable or was it a targeted hit?
- Ask a healer to time an interrupt. Does the cast stop? Does the damage not happen?
- Check if the boss stops taking damage. Is it immune? Is it a phase?
Pull 3-4: assign and refine
Now you can assign roles:
- Who interrupts what. Write it down. “X interrupts the fire cast on a 20-second cooldown.”
- Who goes where. “Stack for the ice phase, spread for the cleave.”
- Which adds are killed first.
Pull 5+: execute
Now the raid should be executing, and any remaining pulls are about execution consistency (a DPS dying to a mechanic they already know, a healer running out of mana) rather than about learning.
—
The interrupt system in detail
The interrupt system is the same in every encounter, and so is the cooldown planning that sits behind it. The WoW Forever Tank Cooldowns Guide (2026) covers how a tank’s cooldowns get assigned to specific boss abilities, which is the other half of the fight.
Because interrupts are the most important and most broken part of boss fights, here is the full picture.
The diminishing returns (DR) system
- After an interrupt lands, the boss gains a short immunity to further interrupts (typically a few seconds).
- The DR is shared across all interrupt types — a stun, a silence, and a fear all count.
- This means: if five people hit their interrupt at once, four of them do nothing and you have wasted the cooldown.
The rotation: assign interrupters in a list, and each one goes in turn. “Interrupt 1, 2, 3, 1, 2, 3.” If the cast is longer than the DR window, the same person can hit it twice.
What makes a good interrupt target
- A regular cast (not a channel) — channels are usually uninterruptible unless the boss is specifically vulnerable.
- A cast that does significant damage.
- A cast you can identify quickly — a distinct name or colour.
What NOT to interrupt
- A cast that is part of the “safe” phase — many bosses have a cast that ends a mechanic, and interrupting it prolongs the fight. This is a real trap.
- A defensive cast (a boss going immune or calling adds).
- A cast you have not confirmed — interrupt on pull 1 and you might break the encounter design.
—
The add-management system
Assigning adds
For the dungeon versions of these fights, the WoW Forever Dungeon Boss Guide (2026) covers every Northrend heroic boss mechanic in detail — it is a good place to practise reading a boss on a much smaller scope than a raid.
Adds are where most raid wipes come from, because they are not the boss and people are watching the boss.
The assignment method:
- Name each add type. “Left add,” “right add,” “caster,” “big one.”
- Assign each to a player or role. Tank takes the melee one, ranged take the caster, DPS on the big one.
- Use markers if the fight has them — a skull marker on the add you want focused.
- Kill order matters. If the boss heals when a specific add lives, that add goes first.
The “boss is not taking damage” check
If the boss’s health bar is not moving, you are hitting the wrong thing. This is the single most common add mistake, and the fix is a marker. A skull marker on the add that is killing you removes the problem entirely.
—
Pre-pull preparation
Before every pull
- Know the mechanic. Read the guide for the boss the night before, not during the pull.
- Assign interrupts. Written down, with names.
- Assign adds. Named, with markers.
- Know your positioning. Where do you stand for each phase?
- Know the timers. Enrage, phase transitions, add spawns.
- Have the consumables. Flasks, food, healthstones.
The strats from the guild’s perspective
A strat sheet is worth more than any guide. One page with:
- The boss’s casts and what to do about each.
- The interrupt list.
- The add list.
- The positioning for each phase.
Keep it on a second monitor or a phone. Reading a wiki page on the pull is worse than not reading.
—
Frequently Asked Questions
How many pulls does it take to learn a WotLK boss?
3-5 for a good group if you use the first-pull-watch method. The Blood Prince Council can be learned in 2 pulls; the Lich King takes 20+ for most groups because it is three mechanics layered together.
How do I know if a cast is interruptible?
The colour. Yellow or red cast bars are usually interruptible. Also, the boss becomes immune to interrupts for a few seconds after an interrupt lands — if your interrupt “failed” with no message, check whether someone else just interrupted it.
What is the biggest mistake new raiders make?
Watching the boss instead of the ground. Most avoidable damage is a mechanic on the floor, and you cannot see it if your camera is pointed at the boss’s chest.
Should I stack or spread?
Both, depending on the mechanic. Some fights require stacking (a “stack for the ice” phase), some require spreading (a cleave). Ask, and mark it. Never guess.
How do I assign interrupts in a small raid?
Two people on rotation is usually enough for most casts. The smaller the raid, the more likely each person is the one who gets hit by a targeted ability — so interrupters need to be assigned to specific casters who will not be chosen as targets.
What is the DR timer on interrupts?
A few seconds, boss-dependent. The practical rule: if your interrupt did nothing, someone else interrupted just before you. Wait a couple of seconds and try again.
Do I need to interrupt every cast?
No, and doing so can make the fight longer. Some casts are part of the intended solution. Read the guide and confirm before you start.
—
Conclusion
Learning a boss is a decoding problem, not a DPS problem, and it has a method that most players never adopt. The key points:
- Every mechanic is one of seven categories — targeted, AoE, positioning, movement, adds, interrupts, dispels.
- Pull one is for watching. Write down the boss’s actions.
- Pull two tests one thing. Do not change everything at once.
- Interrupts have shared diminishing returns — rotate, do not dump.
- If the boss’s health is not moving, you are on the wrong add. Use markers.
- Have a written strat sheet. Reading a wiki on pull is worse than not reading.
The core skill is watching the ground instead of the boss. The most avoidable damage in every fight is a mechanic you walked into while your camera was pointed at the boss’s health bar, and the fix costs nothing but attention.
If you’re learning bosses on WoW Forever in 2026:
- Watch on pull one.
- Name the mechanic’s category.
- Assign interrupts with names.
- Mark the adds.
- Keep a strat sheet.
Watch the ground, rotate the interrupts, mark the adds. That’s the mechanics loop.
—
Sources and references used in this guide: standard WotLK 3.3.5a boss ability sets, interrupt diminishing-returns behaviour, and dispel mechanics from public game documentation and community raid guides, plus WoW Forever server-specific encounter tuning confirmed with server administration. Encounter mechanics vary by realm — verify current values with your own server’s community.